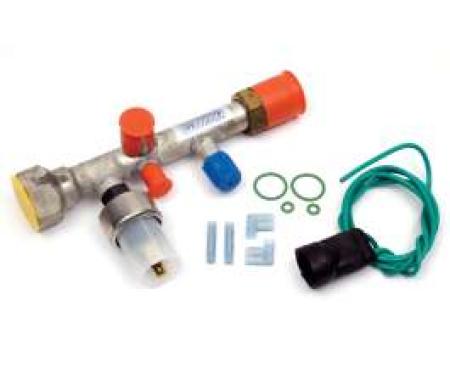
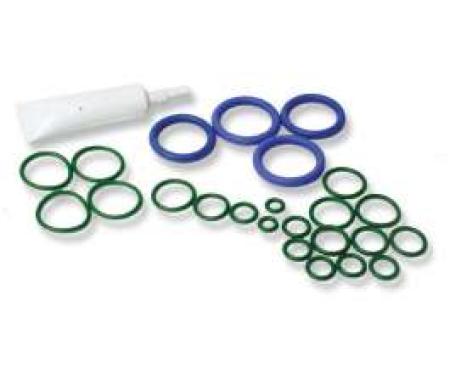
This Corvette Air Conditioning Refrigerant Retrofit Kit converts vintage 1963–1987 Corvettes from obsolete R-12 to modern R-134a refrigerant. Designed for classic Corvette owners and restorers, the kit supplies the hoses, fittings, service port adapters, O-rings, and basic components needed to upgrade the A/C system so it runs safely and efficiently on R-134a. The retrofit helps protect original components, improves availability of refrigerant and service, and is engineered for reliability and ease of use during installation and future maintenance.
Features:
Fitment: Designed for Chevrolet Corvette model years 1963 through 1987.
Converts factory R‑12 A/C systems to R‑134a for modern refrigerant compatibility.
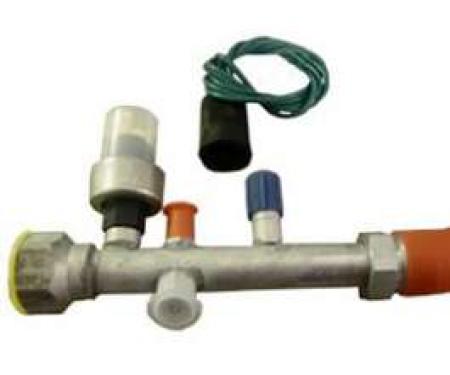
Includes service port adapters, new O‑rings, hoses and fittings where applicable to reduce leaks.
Helps preserve original A/C components by eliminating dependence on hard-to-find R‑12.
Simple, service‑friendly retrofit that enables charging with readily available R‑134a.
Durable replacement seals and fittings improve long‑term reliability and reduce leak risk.
Suitable for restoration projects or routine maintenance to bring vintage A/C up to current service standards.
Installation / Application:
Difficulty: 3/5
Estimated time: 1–3 hours (depending on system condition and tools available)
Suggested Tools:
A/C manifold gauge set compatible with R‑134a
Vacuum pump
Refrigerant recovery machine (for legal R‑12 evacuation) or certified professional service
Basic hand tools (wrenches, screwdrivers)
Torx/Allen/ratchet set as required by vehicle
UV leak dye and UV lamp (optional)
Scale for charging refrigerant
Safety goggles and gloves
Instructions:
Safety first: Work in a well-ventilated area. If the system contains R‑12, have refrigerant recovered by a certified technician per legal requirements before beginning.
Inspect system: Check compressor, condenser, hoses, and evaporator for obvious damage or heavy oil/metal contaminant. Replace any severely degraded components before retrofit.
Replace service components: Install new O‑rings and any hoses/fittings supplied in the kit. Replace receiver/drier or accumulator and expansion device/orifice tube as recommended for R‑134a conversions.
Install port adapters: Fit the supplied R‑134a service port adapters onto the high and low side service valves to allow charging with R‑134a manifold gauges.
Evacuate system: Connect manifold gauge set and vacuum pump. Evacuate the system to at least 29 inHg and hold for 30–60 minutes to remove moisture and air.
Leak check: With the system under vacuum, observe for pressure rise; if present, locate and repair leaks, then re-evacuate.
Charge with refrigerant: Weigh and charge the system with the recommended amount of R‑134a for your Corvette year/model. Use manufacturer or conversion guidelines for correct charge amount and oil adjustments (POE oil if required).
Functional test: Start the engine, run A/C, and monitor pressures and cabin temperature. Verify proper cycling, compressor engagement, and cooling performance.
Final checks: Inspect fittings for leaks (use electronic sniffer or UV dye), tighten as needed, and ensure all caps and shields are reinstalled.
Documentation: Record new refrigerant type and charge amount on vehicle A/C service label for future reference.
Vehicle Fitment:
The Vehicle Fitment Guide is to be used as a general reference. The data has been provided by our suppliers and manufacturers and may contain errors or incorrect data. Always refer to a professional to verify correct fitment for your vehicle.